


Laser-engraved acrylic LED signs are a fantastic way to create eye-catching, personalized designs that glow beautifully. Whether for home decor, business signage, gifts, or custom artwork, these illuminated signs add a professional and stylish touch to any space.
Using a laser engraving machine, you can etch intricate patterns, text, or logos onto a clear acrylic sheet, which, when paired with an LED base or strip, lights up the design in a striking way.
In this guide, we’ll walk you through the entire process—from choosing the right materials and designing your artwork to engraving, assembling, and perfecting your LED sign. Whether you're a beginner or an experienced laser user, this step-by-step tutorial will help you create stunning laser engraved acrylic LED signs with ease.

In this article:
Part 1: Use Laser Engraver to custom Acrylic LED Sign
Items Required:
- Engraving Material: Clear acrylic sheet (recommended thickness, e.g., 3mm-5mm)
- Engraving Machine: Diode Laser Engraver
- Design Software: LightBurn, Adobe Illustrator, LDS
- Engraving Design: Text, Images, Patterns, etc
- Assist Tool: Cardstock, marker pen, tempera paint or marking tape
Step 1: Choose your material - clear acrylic sheet
Choose a clear acrylic sheet that not be so thin, otherwise, it would bend when it absorb the heat from laser.

Step 2: Choose the clear acrylic engraving machine
Ensure that your laser engraving machine is compatible with clear acrylic sheet engraving. Evaluate various usage scenarios and select the most appropriate machine accordingly.
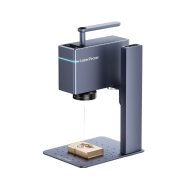
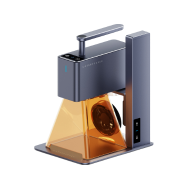
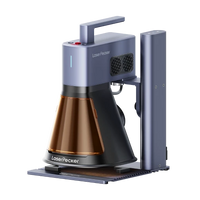
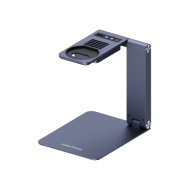
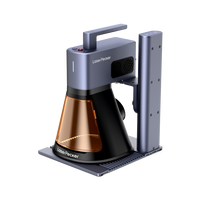
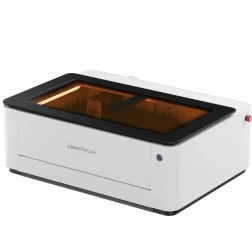
Here, we choose LaserPecker 5 (LP5), which is a dual-laser and multi-functional laser engraver.
Don't have LaserPecker 5? No problem at all! You can use LP4, LP2, or any other laser engraver that works well with acrylic engraving and continue with the following steps.

Step 3: Pepare your engraving design
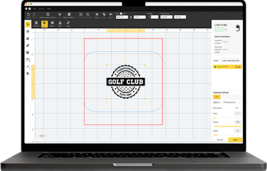
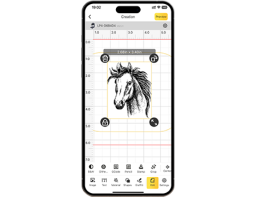
Use a free graphic design app/software to create and then save it in the svg, png or other format. Consider size, shape, and other details.

Source: Design for Clear Acrylic Laser Engraving
Step 4: Set up the laser engraving machine
Firstly, Connect the laser engraver to your computer or mobile devices and then open the LasePecker's design app/software or LightBurn to load your design.
Secondly, Place the items within the designated working area and check if the laser lens is properly focused. When the two red dots overlap, it is well-focused!
Thirdly, You need to turn on the "Preview" mode to see if the design fits properly on the acrylic sheet. If it doesn't, adjust its size and position to match the dimensions of your material.

Finally, Access the software's laser settings to adjust parameters like power, speed, and resolution. You might be wondering, "How much laser power is needed to engrave acrylic LED sheet?" Rest assured, I've got you covered!
Here are some recommended parameters to engrave clear acrylic sheet:
LP5 (20 W 450 nm): Resolution: 2k; Power: 28%; Depth: 26%; Pass: 1LP4 (5 W 450 nm): Resolution: 2k; Power: 100%; Depth: 15%; Pass: 1
To explore the recommended LaserPecker engraving and cutting parameters, refer to the settings table that applies to any LP machines, including LP1, LP2, LP3, LP4 and LP5.
Step 5: Engrave Your Acrylic LED Sign Now
Double-check everything to avoid mistakes. Then, hit the start button and watch the magic happen. The laser brings your design to life. Keep an eye on it, and you're all set!
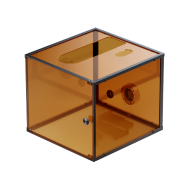
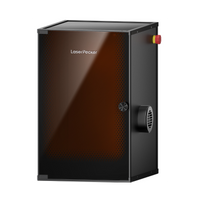
When operating a laser engraving and cutting machine with a 450 nm blue laser, it's important to wear protective goggles, use a laser safety cover, or work within a Safety Enclosure to protect your eyes and body from potential harm, as blue lasers can pose risks.
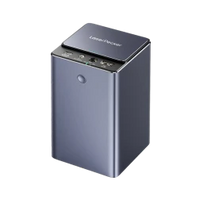
During the engraving process, smoke and odors may be generated. To minimize potential respiratory risks, it's recommended to use an Air Purifier for better ventilation and air quality.
Part 2: Assembling the LED Sign
Once your laser-engraved acrylic panel is ready, assembling the LED sign is straightforward. Start by cleaning the acrylic to remove dust and fingerprints, ensuring maximum light clarity. Choose a suitable LED base, whether a pre-made light base with a slot or a custom setup using LED strips attached to a wooden or acrylic stand.
Carefully insert the engraved panel into the slot or position it above the light source, making sure it fits securely for even illumination. If needed, use transparent tape or brackets to stabilize the panel. Turn on the LED light to test the glow, adjusting positioning for the best effect.
Finally, secure all components firmly, and consider adding a protective film or decorative frame for a polished look. Your custom LED sign is now complete and ready to shine!
Part 3: Why Laser Engraving is the Best Method for Making Laser-Engraved Acrylic LED Signs
When it comes to creating high-quality acrylic LED signs, laser engraving stands out as the best method. Unlike traditional engraving techniques, laser engraving offers precision, efficiency, and versatility, making it ideal for detailed designs and professional results. Here’s why:
1. Unmatched Precision and Detail
Laser engraving allows for incredibly fine details, making it perfect for intricate patterns, text, and logos. The high precision of laser beams ensures that even the most delicate elements of your design are engraved with accuracy, resulting in sharp and clean lines that enhance the sign's visual appeal.
2. Versatility in Design Options
Laser engraving works with a wide range of fonts, patterns, and images, allowing you to personalize your LED sign in countless ways. Whether you’re engraving a company logo, custom artwork, or a special message, a laser machine can bring your vision to life with high accuracy and consistency.
3. Compatible with Various Acrylic Types
Laser engraving works well on different types of acrylic, including transparent acrylic and opaque acrylic.
4. Long-Lasting and Durable Results
Acrylic signs engraved with a laser do not fade or wear over time, making them a durable and long-lasting choice. Since the engraving is permanent, you don’t have to worry about peeling or deterioration, ensuring that your LED sign remains vibrant for years.
Conclusion
Creating a laser-engraved acrylic LED sign is a rewarding and creative process that combines precision engraving with stunning illumination. By using a laser engraver, you can achieve intricate details and personalized designs that stand out beautifully when lit. Assembling the sign is simple, allowing you to bring your custom creation to life with the right LED setup. Laser engraving remains the best method for crafting these signs due to its accuracy, durability, and ability to create crisp, glowing effects. Whether for home decor, business displays, or unique gifts, a custom acrylic LED sign is a stylish and eye-catching way to showcase your creativity!


